



WYSIWYG WEB BUILDER
NAVIGATIONAL CARDS
Tutorial
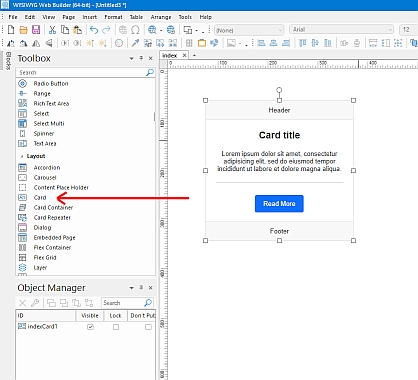
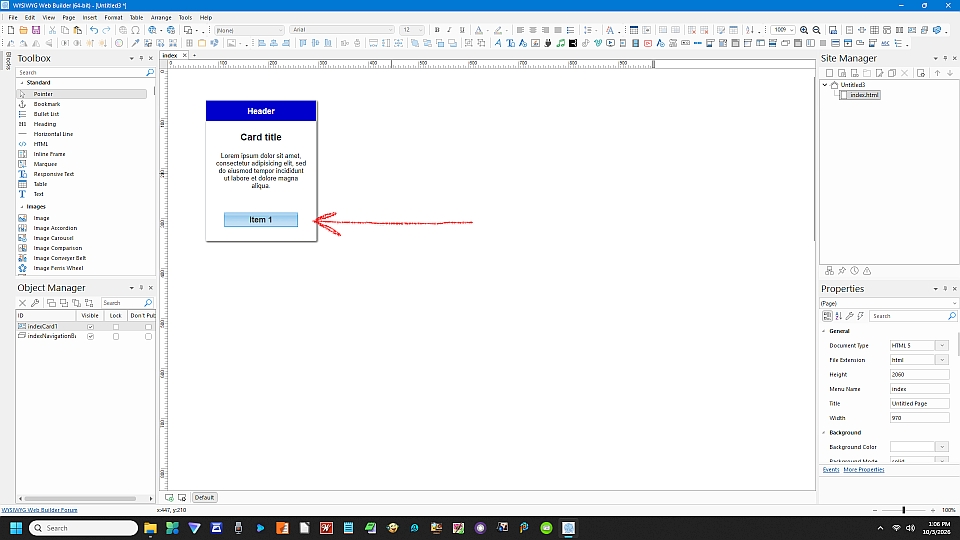
Look on the left side, and find Toolbox. Scroll
down to Navigational card. Click on that. Now,
draw out the dialog box for the navigational card.
Here you will find a header, card title, a
description, a line break, and a navigational
button. You will also find a footer. This can be
altered to suit your personal needs. You can
always delete anyone of these items.
I would advise keeping the header, card title, and
content. If you wish to use a different navigational
type button, you can always delete that
navigational button, and one of your own and then
move it over to the location where that
navigational button had been.
Just make sure that it is in the properties where
you bring the button forward rather than from
behind.
WYSIWYG WEB BUILDER
NAVIGATIONAL CARDS
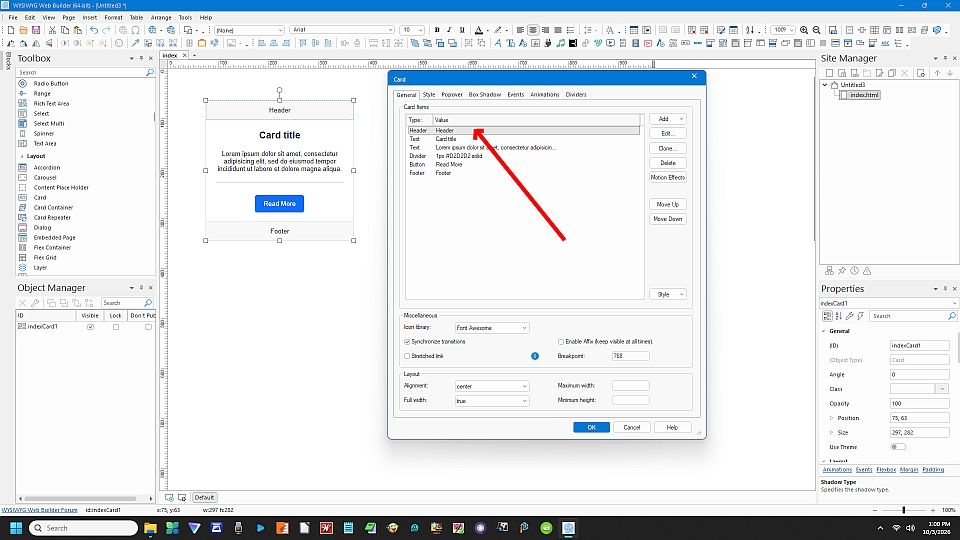
At the top we'll click on our header, and it'll pop
up a dialog box where we can then double click
header once again, And then we can fill in the
information what we want to say in that header
portion.
Here you can also change the color of the fonts,
and the color of the background as well.
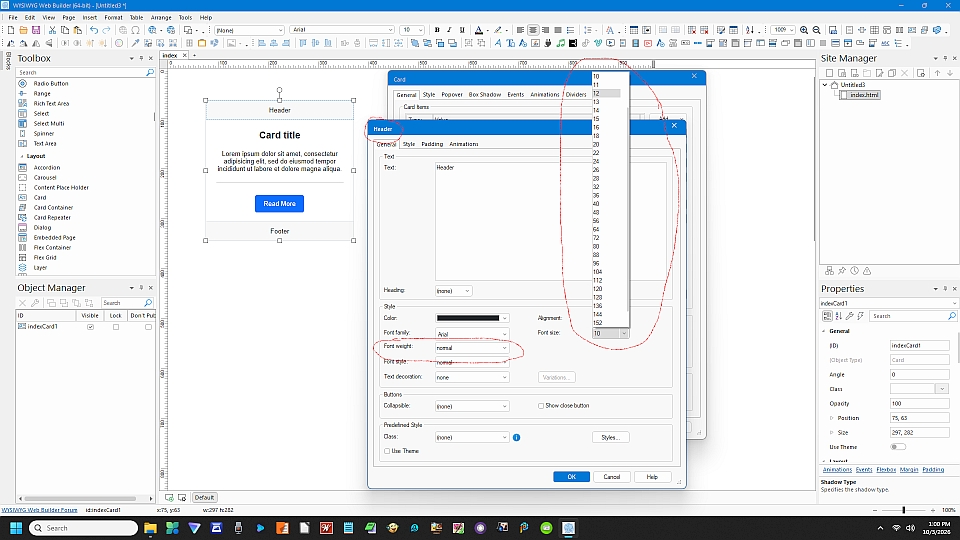
Also in this illustration we can see where we can
use any different font size we wish, as well as
the font weight which is normal bold or italic. The
same is for the card title the content and the
footer.

Under the style tab, we can then choose both the
font color as well as the background color of the
header.
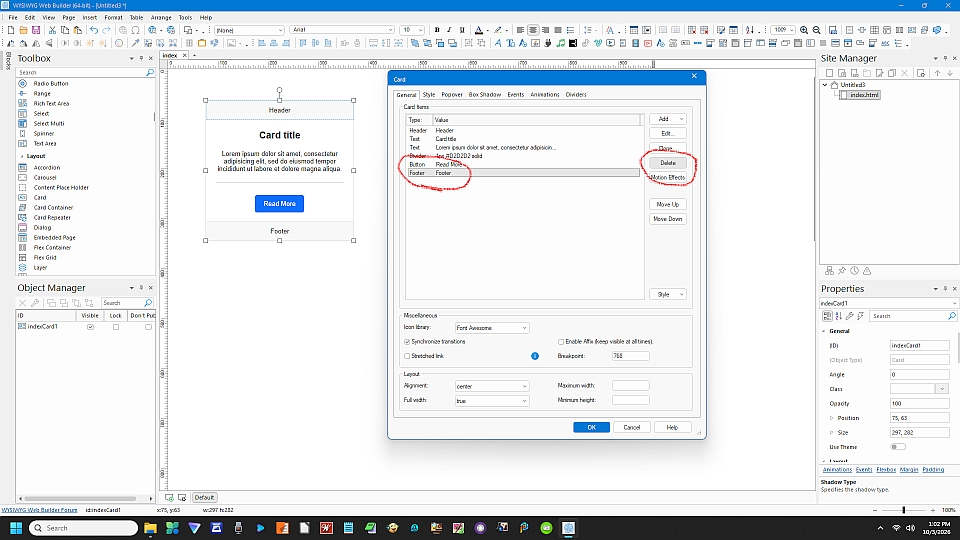
While many people leave the footer on, you can
also delete the footer, giving you additional room
to put a different style roll over navigational
button.
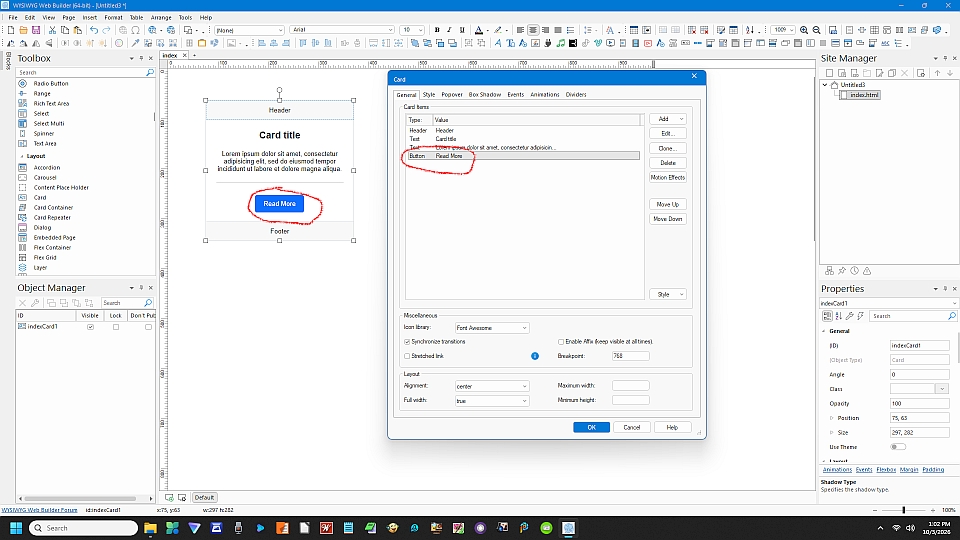
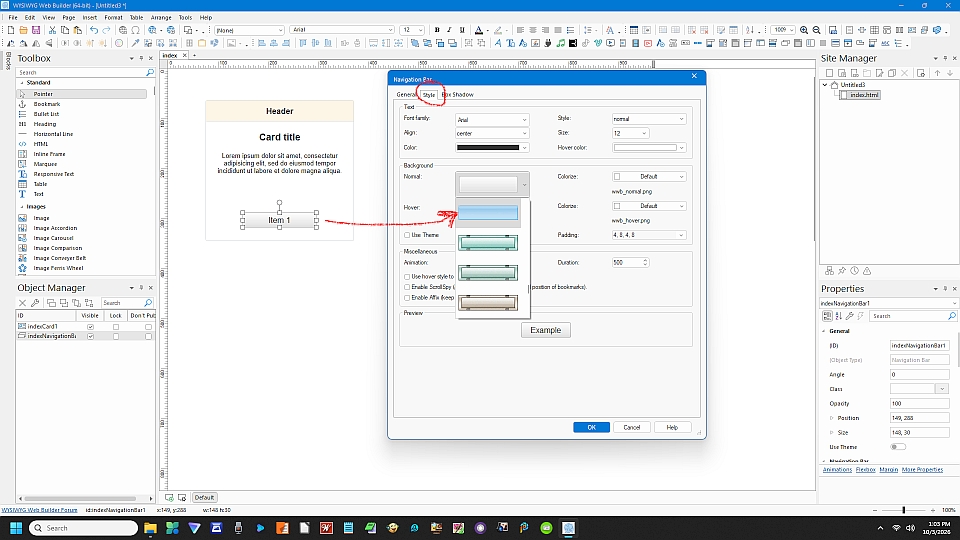
Also you have an option to use the existing non
rollover navigational button, Or you can delete it
and bring in your own rollover navigational button.
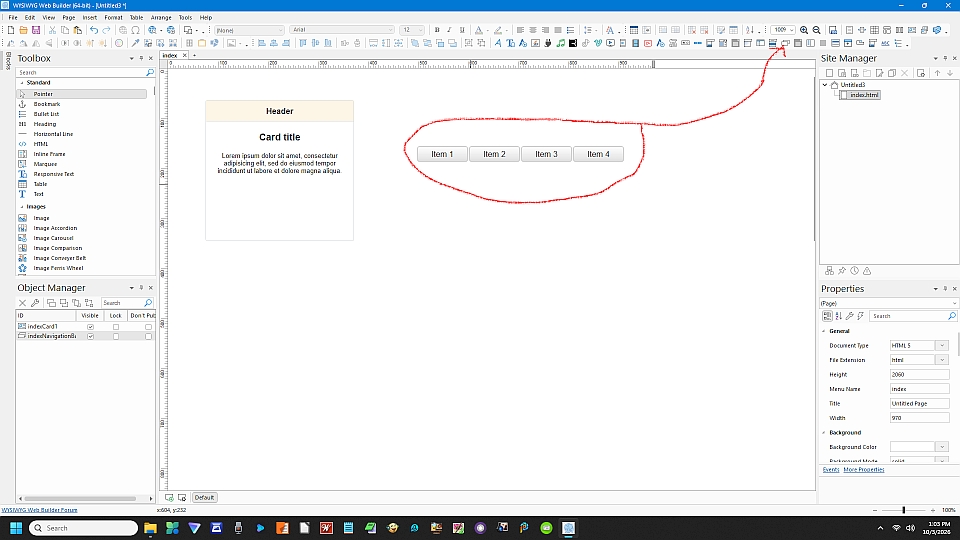
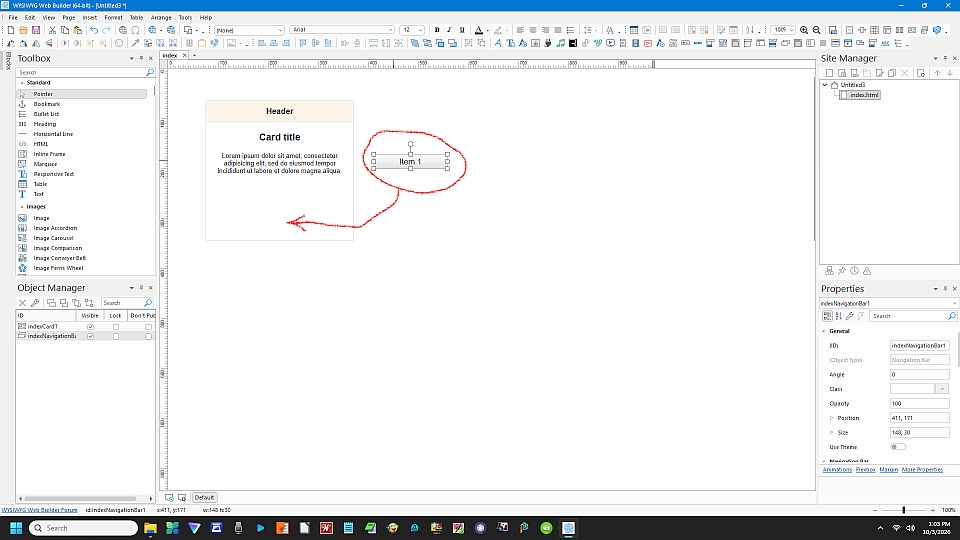
You can add a navigational button, or button
bar. All you have to do is, to remove all the
other buttons except the one that you're going
to use as your rollover navigational instrument.
The nice thing about this is it's already SEO
compliant. Just make sure you've got your link
correct, the name of the button, tell what it
does, you can do that information in the "ALT"
text section.
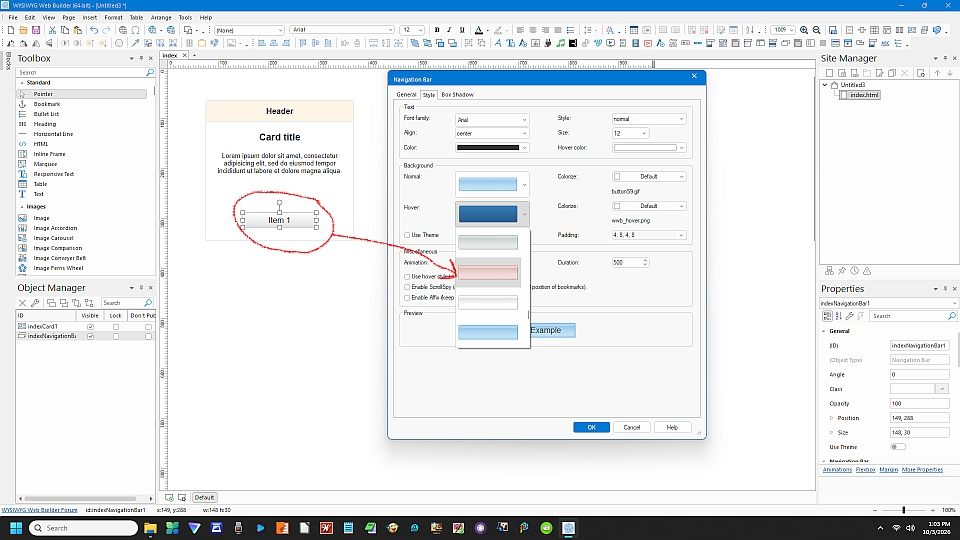
Here we can add a second button as our rollover
button. After we have done that we can pick out
the colors for the initial state of the button, And
the color of the text for the rollover button . This
makes it very useful for your visitor to know 0 this
is the button that I used to go where the
recommends.
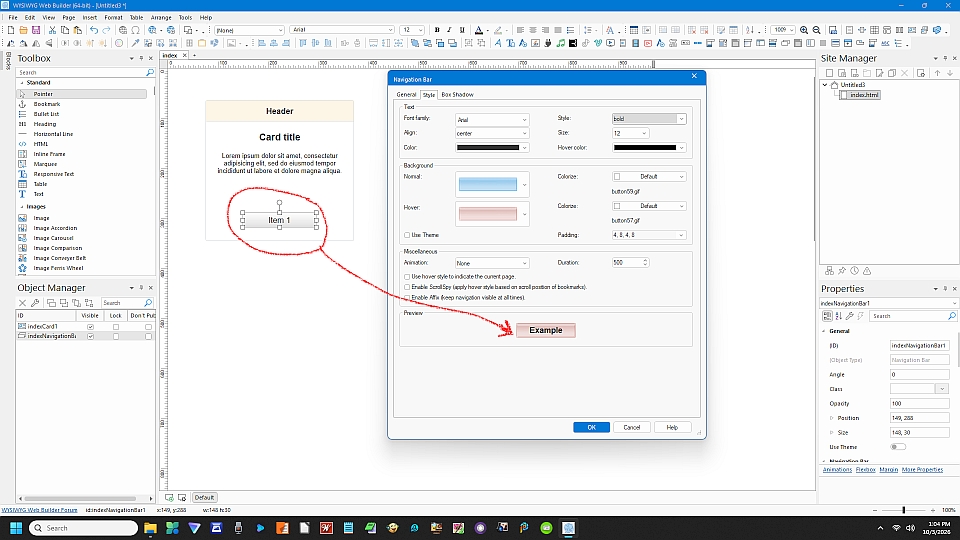
Here we can see as we've moved our mouse
cursor over the button it has rolled over to the red
color. This lets your visitors know they have
reached the proper link To arrive at the web they
desire to go to.
Also there's another little trick that you can use
using navigational cards, Is the border . You can
add a Gray border, and create padding, and line
with .
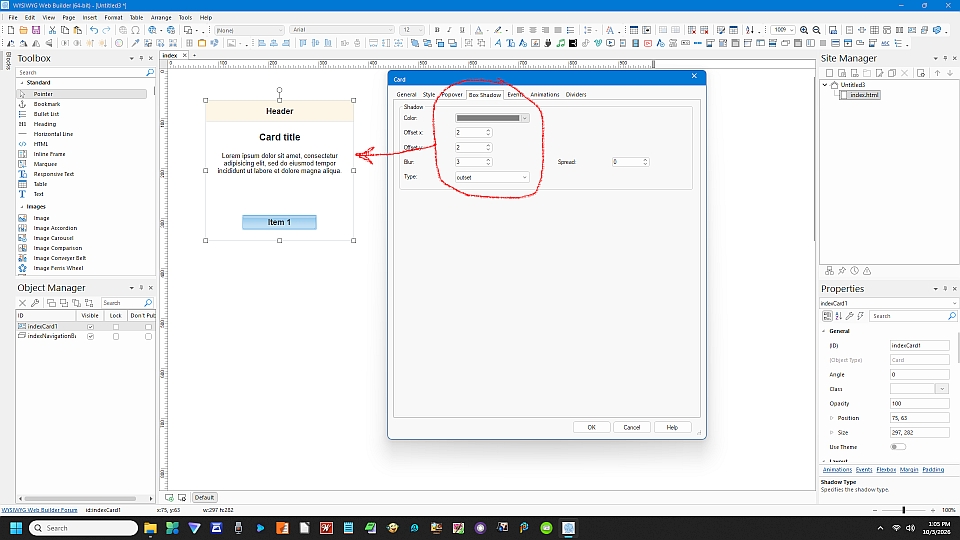
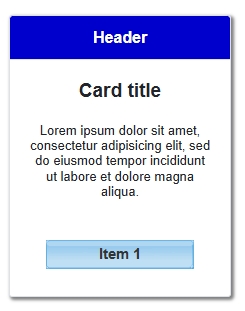
Then you can also create shadow by using a
slight offset and blur. Together with that you can
have a three dimensional look card that appears
to slightly lift itself up off of the page.
Here in this example you can see where I have
offset the drop shadow and blurred it so that it
would be dark up close to the text box and it
fades to a lighter Gray as it pans out. That's what
the blur feature is for.
Biscuits a very effective 3D illusion.
If you have elected to take out the stationary
navigation button, and installed a rollover
Navigational button, You just delete it from within
side the card.
Then locate the chosen navigational button on
top of the card. It will remain stationary both
desktop as well as mobile and only minor
adjustments may or may not need be made for
tablet versions around the 480 to 768 pixel wide
screens.
Once you choose navigational rollover button, as a normal way of doing things you go to style , and there you will find the different colors of rollover buttons that come with the program, and you can even choose outside graphics to make your rollover buttons or images that to be placed inside the navigational card.
Just remember always to bring the navigational button forward. Up at the top you'll see clear squares and 4 blue squares group together. This is where you send things forward or send things backward.
Just remember always to bring the navigational button forward. Up at the top you'll see clear squares and 4 blue squares group together. This is where you send things forward or send things backward.
This is a little better close up look at the drop Shadow effect. If you want more drop shadow, just add more blur. Also you can adjust line thickness and several other settings while you're there. And this is how you use cards and what you see is what you get web builder, And how do you substitute rollover links for those navigational cards as well.